
Deathwalker build: Ranged shadow network
A practical Deathwalker build framework: role, turn planning, equipment priorities, perk choices and common mistakes.
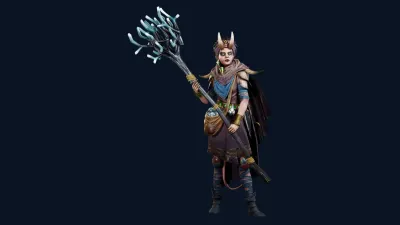
What is this build trying to do?
Favor shadow generation, movement of shadows and repeatable ranged attacks from useful positions. Keep personal repositioning available so the character can catch up when the encounter moves. Spend shadows when the resulting removal prevents meaningful danger.
This is a role-based strategy framework. It does not claim to be a verified level-by-level digital card, equipment or perk list. Check the current digital card text before making an irreversible selection.
How do you set up a repeatable turn?
- Establish a way to generate shadows before loading the hand with consumers.
- Advance the shadow positions toward the party’s next target.
- Attack through the network and reposition the character before it falls too far behind.
Establish your shadow supply before the party runs far ahead. Move the network toward the next fight while keeping your character outside unnecessary threat. Distinguish actions that create shadows from those that merely consume or reposition them.
Which cards should you prioritize?
Separate the hand into shadow supply, shadow positioning and payoff. Call to the Abyss, Medium, Black Barrage and Strength of the Abyss are all present in digital notes. Black Barrage’s Dark enhancement and Strength of the Abyss interaction are explicitly documented, making them candidates to inspect for a ranged damage sequence. Keep a generator when replacing a low-level attack; an additional consumer is not a substitute.
Compare a candidate card against the job your current hand cannot accomplish: reaching a useful hex, making the primary attack legal, surviving the next enemy action or recovering a disrupted turn. Avoid upgrading a number while losing the only action that keeps the sequence reliable. Exact level selections remain subject to digital Codex verification.
How should equipment and perks support the plan?
Buy movement or repositioning help if the character repeatedly trails the shadow network. Accuracy or attack enhancement is useful only if it applies to the actual attack being made. Avoid treating shadow tokens as independent units that automatically inherit the character’s equipment.
Favor modifier improvements that support your normal attack sequence before situational movement perks. Compare any shadow-related perk against the rate you generate and spend shadows, rather than selecting it because its name matches the theme.
What should you change when the plan fails?
Do not spend the same shadow twice in a sequence. Official digital fixes specifically restrict Strength of the Abyss interactions with attacks performed from multiple shadows; inspect the legal selection instead of assuming every displayed shadow is expendable.
Identify whether the failure was positioning, timing, a resource shortage or a party mismatch before replacing the entire hand. Record a change and test it over another expedition rather than changing several decisions at once.
Which references help with this build?
Start with the Deathwalker class reference, use party composition to assign allies’ roles, and revisit card economy when the party exhausts before completing its objective.
Evidence boundary: Digital starter identity verified; strategy is editorial and tabletop-informed, not a tested 1.0 card list.
Sources and version notes
Researched on October 16, 2026 for the digital edition. Strategic recommendations are editorial advice; they are not represented as hands-on testing. Refer to current in-game tooltips when a patch changes an interaction.
- Frosthaven Steam store — Digital: release date, six starters, co-op, outpost and combat overview
- Official Frosthaven game website — Digital: starter roster, Geminate forms and official media
- Cephalofair official Frosthaven FAQ — Tabletop ONLY: class mechanics and rules context; not a claim of exact digital implementation
- Character Spotlight: Deathwalker — Primary official digital announcement; historical patch facts require current-version context.
- Patch Notes 0.31984 — Primary official digital announcement; historical patch facts require current-version context.
- Patch Notes 0.13.30384 — Primary official digital announcement; historical patch facts require current-version context.
- Patch Notes 0.12.29862 — Primary official digital announcement; historical patch facts require current-version context.
- Patch Notes 0.32895 — Primary official digital announcement; historical patch facts require current-version context.
- Patch Notes 0.12.3 — Primary official digital announcement; historical patch facts require current-version context.
- Patch Notes 0.31845 — Primary official digital announcement; historical patch facts require current-version context.
- Patch Notes 0.32366 (July 22) — Primary official digital announcement; historical patch facts require current-version context.
- Monsters of Frosthaven – Meet the Algox — Primary official digital announcement; historical patch facts require current-version context.
Gallery
Related Articles
builds
Banner Spear build: Formation captain
A practical Banner Spear build framework: role, turn planning, equipment priorities, perk choices and common mistakes.
builds
Blinkblade build: Tempo skirmisher
A practical Blinkblade build framework: role, turn planning, equipment priorities, perk choices and common mistakes.
builds
Boneshaper build: Sustainable summon line
A practical Boneshaper build framework: role, turn planning, equipment priorities, perk choices and common mistakes.
Was this helpful?
Thank you. You can report a correction through the contact page.